
This is a step by step guide on how to run a mini competition using the Sourcing Cloud portal. Please note that this document is created by CPC, and not Elcom the providers of the portal. Elcom have created a number of training videos available throughout the portal by clicking 'training' on the menu bar across the top of the screen.
If you have any issues using the system or need support please contact the Elcom support desk at [email protected]
To Run a Competition
Once you have logged in, you want to click Home in the top right-hand side of the screen and the drop down menu will appear, you then need to click the Tender option.
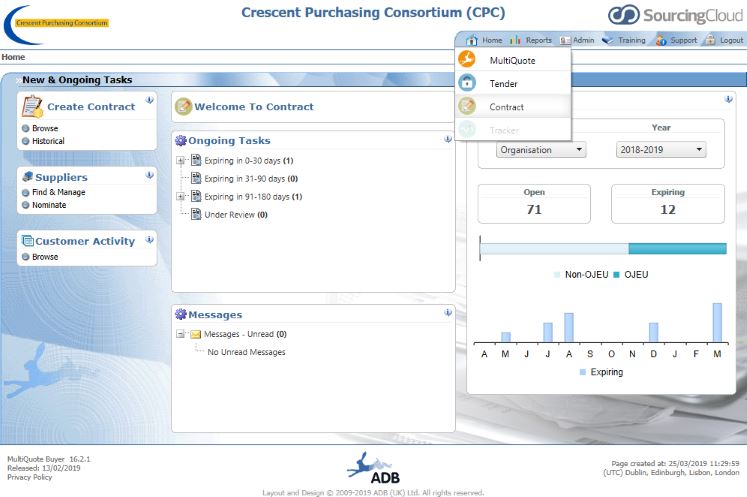
Once you have clicked tender, you will see a box on the left-hand side saying Run Competition, once you have clicked the box you will see another box appear, please click Mini-competition and press Select.
You should then see the below screen
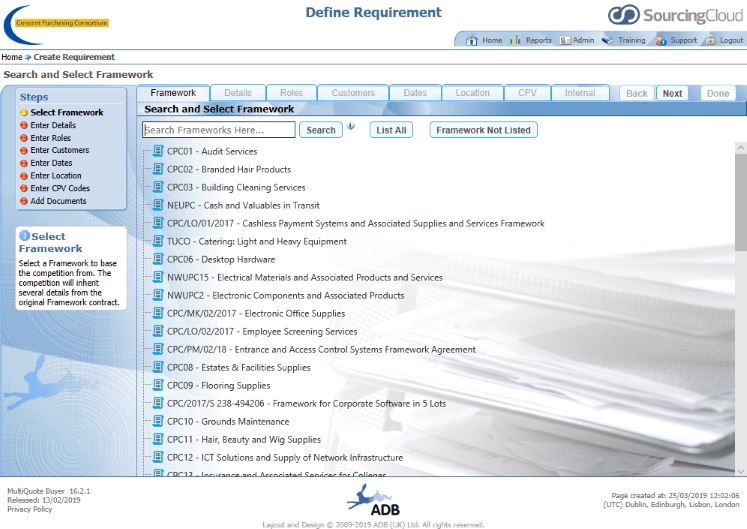
You will now have to select what framework you would like to run a mini competition through. You can do this by searching the framework title in the search bar.
Once your framework has been selected you will then be asked to select the lot you are running a mini competition through (if the framework is split into lots). Once selected then click Next in the top right corner.
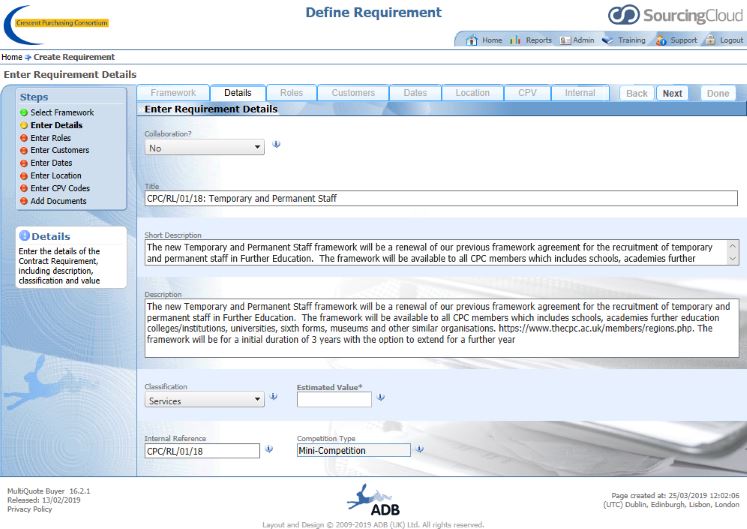
You will then be asked if the mini competition is a collaboration, please click yes or no and then the framework description will come up. On this page you will need to enter the estimated value of the contract.
Once you have selected the estimated value, click Next and it will take you to the Roles section. Choose the department by clicking confirm. This will then lead to all the users in that department appear and you can click Next.
The 'Customers' section will then appear, please click Next.
You will then see the below screen
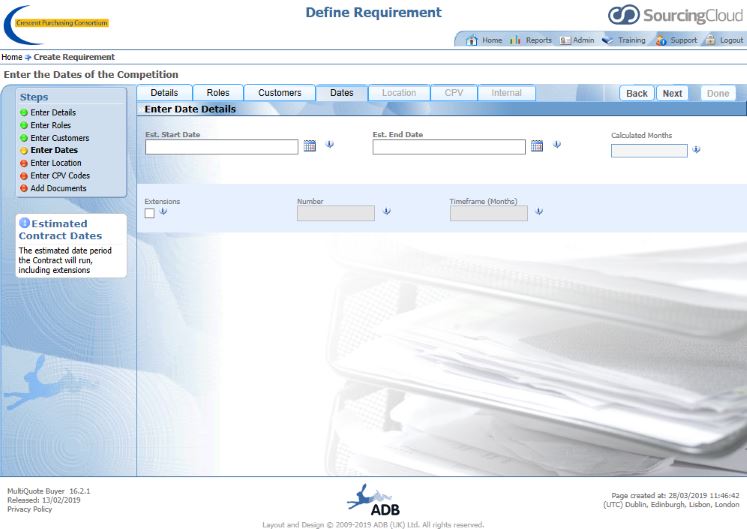
Here you will need to insert the start and end dates of the contract and not the tender process. You can also indicate whether there will be any optional extensions to your contract. If it's a one-off purchase, we suggest that you enter the start date as the date you are going to award the contract and end date as the delivery date. Once completed please click Next.
You will then be taken to the Location section, this will default to your location so please click Next.
You will then be taken to the CPV section to add any CPV codes. This will have already been completed when the framework was set up. Click Next.
You will then be taken to the Internal Documents section. Here you can add any documents and make any internal notes. Suppliers will not be able to see these internal documents/notes. This section is optional and the type of internal document a college might add could be the business case for the requirement. Once completed click Done.
You will then see the below screen.
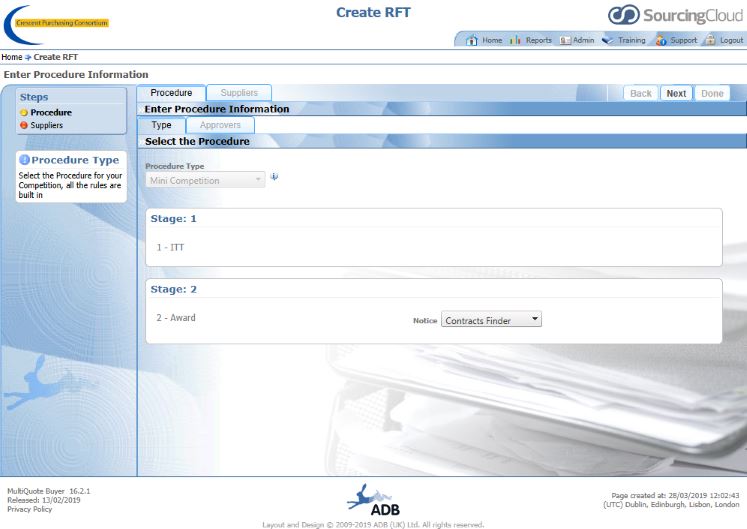
As you can see, the procedure type should be set as 'mini-competition', Stage 1 is ITT, you will shortly be able to upload your documents and Stage 2 is your award stage. If the contract is over £25k then you will need to select Contracts Finder, if not then you can select none. Then click Next.
You will then be taken to the Approvers section this is optional where you can specify users to be approve various points of the procurement. If this is not required, then please click Next.
You will then be taken to the Suppliers section. Here you will see the suppliers who are awarded a place on the framework lot that you selected or if the framework isn't split into lots it will be the suppliers who are on the framework. Please click Done.
You will then see the below screen
You will need to click Create ITT on the left side of the screen.
You will then see this page
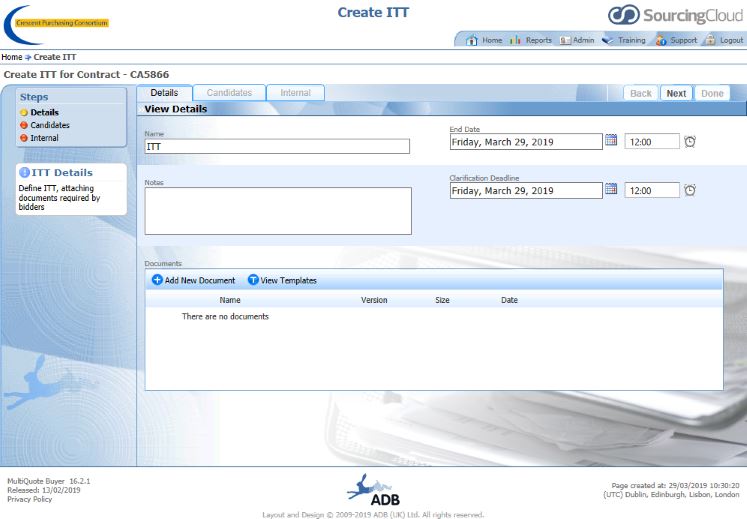
On this page, you will need to insert your mini competition timeframe. The end date is the deadline for submissions. You can insert you mini-competition document by clicked Add New Document.
You can also use the notes section to add any information regarding site visits to ensure suppliers see it in case they don't download the mini-competition document straight away.
Once completed click Next.
You will then be taken to the Candidates section, this will be blank, please click Next.
You will then be on the Internal section, here suppliers will not see anything you insert, if you do not wish to add any internal notes, please click Done.
You will then see the below screen
You will need to click Publish Stage on the left-hand side under actions for the mini-competition to launch.
Once clicked, suppliers will receive email notification of your mini-competition
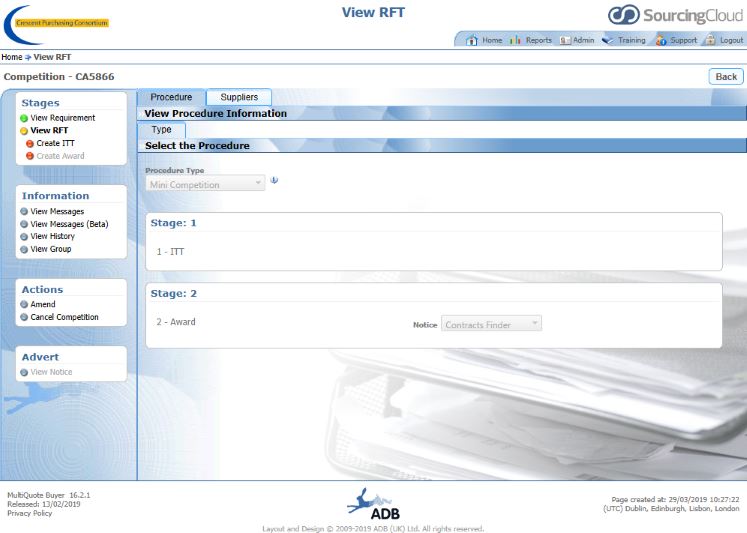
To view the information you have sent and see which suppliers have opted in or out of the competition; return to the home screen by clicking on Home and Tender. From the Ongoing Tasks section in the centre of the screen, select your current competition from the list, then click View RFT, from the left-hand navigation panel.
Select Suppliers from the tab across the top. Each supplier will have a traffic light code next to their name, blue indicates they have been invited but not done anything with the competition yet, amber indicates they have expressed an interest but not yet submitted a tender, green if they have submitted their tender, red if they have opted out.
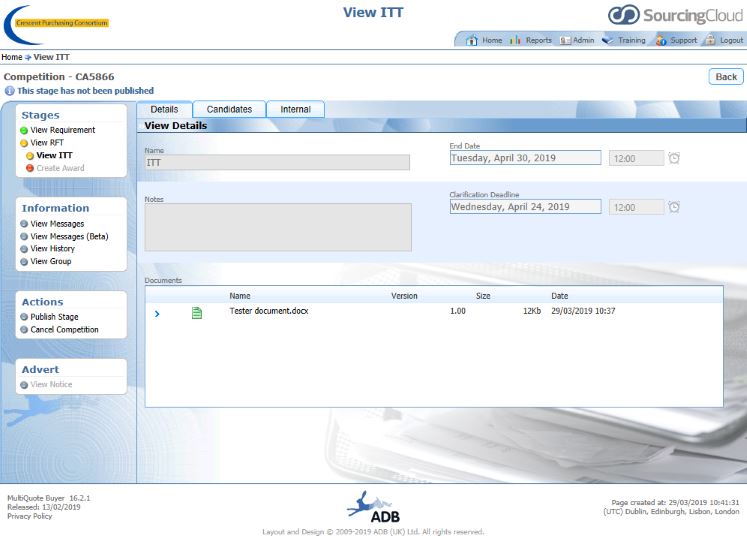
Click View ITT from the left-hand navigation panel and then Submissions tab to see which suppliers have submitted a tender. You won't be able to view the submission until after the deadline. Candidates are the suppliers that have expressed an interest but not yet submitted a tender.
How to view mini competition submissions once the deadline has expired
From the homepage find the competition under Tasks.
Under Actions on the left-hand navigation panel choose Unlock Stage
Go to the Submissions tab. Click the document icon to download or you can export all submissions as a ZIP file enabling you to save them to your PC and complete your mini competition evaluation, by clicking Export Submissions from the left-hand navigation panel.
To record in Sourcing Cloud which supplier has won the mini competition
Click Start Selection under 'Actions' on the left-hand navigation panel
Under the Selection tab, choose the supplier you wish to award the contract to and click the Select button at the bottom of the screen.
Then under 'Actions' on the left-hand navigation screen, click Complete Stage
Under 'Stages' tab click Create Award
You can write internal notes if appropriate -- click Next
You should see the supplier you have already shortlisted -- click Next
The contract start dates should be completed but you can amend if these have changed -- click Next
You can enter additional info if required -- click Next
Enter the value of the contract -- click Next
Can add in internal documents if appropriate
Click Done
Under 'Actions' on the left-hand navigation panel click Complete Stage
This will record the award on the system and put the competition but won't notify any of the suppliers of the outcome.
To notify the successful and unsuccessful supplier of the outcome of the mini competition process
From the homepage find the competition, this will be under Browse on the left-hand navigation panel. Double click to open the competition.
Click View Award from the left-hand navigation panel and then click View Messages.
Click Send new message button to email each of the suppliers individually to notify them of the outcome of the tender and to confirm arrangements for delivery and billing etc with the successful bidder. If you are running a voluntary standstill period, send the standstill notification letters out using this message function.
Write message content and under Recipients select the relevant supplier. Press the send button at the bottom of the screen.